


3D printing filaments come in various materials and colors, but sometimes the perfect finish isn’t straight off the spool. Whether aiming for custom hues, adding details, or creating unique surface effects for wearable parts, painting 3D prints can truly bring them to life.
Among the many filaments used in 3D printing, thermoplastic polyurethane (TPU) stands out for its flexibility, durability, and wear resistance, making it unique in material properties. Parts printed with TPU are often designed to bend, stretch, or absorb impacts—think phone cases, bicycle handle grips, or wearable device straps. Unlike more traditional filaments like PLA or PETG, TPU behaves like rubber, retaining strength without sacrificing flexibility.
However, this very flexibility poses a ultimate challenge for those seeking to add color. Painting TPU is far less straightforward than painting PLA or PETG. TPU resists most coatings, and its tendency to flex means the right paint and method are critical. Without proper techniques, painted TPU parts may crack, peel, or fail to adhere entirely.
In this guide, we’ll explore everything needed to effectively paint 3D-printed TPU parts: from recommended (and avoided) paint types to surface preparation, application methods, and post-processing techniques.
Why Painting TPU Is More Challenging
While it may seem simple at first—just grab some paint and brush—it’s far more complex. TPU’s rubbery, non-porous surface prevents paint from adhering like it does to other filaments, and its flexibility adds another layer of difficulty. Ordinary paint might look good initially, but it will soon crack, peel, or flake off when the part is handled. To understand why TPU painting is frustrating, let’s break down the key issues:
- Material Limitations
TPU is known for strength, elasticity, impact resistance, and low surface energy—all traits that hinder painting:- Low surface energy reduces paint adhesion, leaving coatings sitting on the surface rather than bonding.
- Hydrophobic (water-repellent) properties make water-based paints struggle to adhere without special primers.
- Chemical resistance means solvent-based paints may either fail to bond or damage the TPU.
- Elasticity causes rigid paints to crack when the part bends or stretches.
- Common Problems
Even if paint initially sticks, issues often arise:- Delamination: Layers of poorly bonded paint separate, especially at corners or edges.
- Poor Durability: Unsealed or incompatible paints wear quickly, especially on frequently touched or bent parts.
- Sticky Surfaces: Paints that never fully cure remain tacky, attracting dirt and stains for weeks.
The Solution
Instead of standard painting techniques or common paints, TPU requires a targeted approach. With proper preparation, flexible-compatible paints, and patience, you can achieve attractive, long-lasting finishes on TPU parts.

1. The Best (& Worst) Paints
Once you’ve accepted the challenge of painting TPU, choosing the right paint is critical. TPU needs paint that bends, stretches, and adheres without cracking or peeling. Here are the top choices and those to avoid.
Recommended Paints
Look for paints with strong adhesion, flexibility under stress, durability, and compatibility with soft surfaces. Key terms on labels: “for fabric/leather,” “crack-resistant,” “peel-proof,” or “stretchable.”
- Angelus Leather Paint: A water-based acrylic paint designed for 皮鞋 (shoes). Despite TPU’s hydrophobicity, it bonds well to non-porous, flexible materials like leather and vinyl, thanks to built-in adhesives. It adheres smoothly, dries evenly, and resists cracking under heavy bending.
- Createx Colors (Airbrush Paints): Water-based paints formulated for textiles and soft surfaces, popular in the airbrushing community.
- Jacquard Airbrush & Textile Paints: Designed for fabrics and wearables, they dry soft and elastic—ideal for detailed TPU prints.
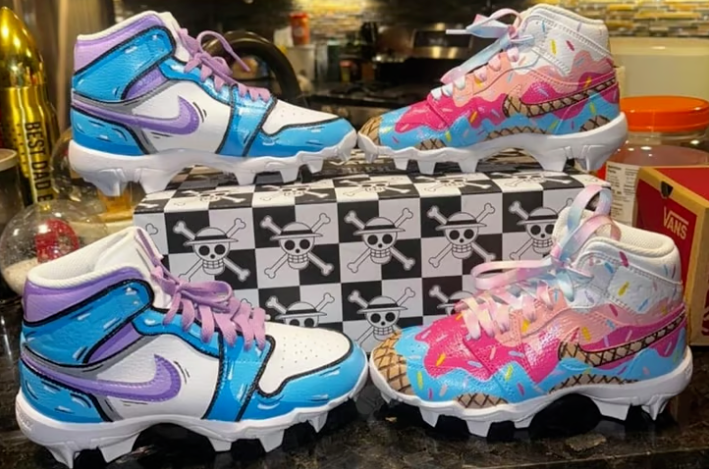
- Tulip Fabric Spray Paint: Formulated for fabrics and wearables, it delivers vibrant, long-lasting color with excellent flexibility, adhering well to soft, stretchy surfaces (great for cosplay props or soft-touch components).
- Dupli-Color Vinyl & Fabric Coating: Originally for car interiors, it works well on TPU, especially in black, gray, and primary colors.
- Liquitex Flexible Modeling Paste: Not a paint itself, but mixing it with standard acrylics enhances flexibility—useful for custom TPU paint blends.
Paints to Avoid
Some paints may look promising but are unsuitable for TPU:
- Fusion or Rust-Oleum General-Purpose Spray Paint: Solvent-based, rigid paints work for PLA/PETG but crack and peel on TPU unless labeled “flexible.”
- Enamel Paints: Oil-based enamels dry hard and glossy, cracking easily when TPU bends. They also have long cure times and poor flexibility.
- Standard Spray Paints: Designed for rigid plastics or graffiti, they can soften TPU surfaces, cause damage, and fail to bond to flexible materials.
2. Preparation of Prints for Painting
Proper surface preparation is key to ensuring paint adheres to TPU. Its naturally smooth, elastic, and sometimes oily surface demands this step—skipping it guarantees poor adhesion or uneven results.
1. Clean the Surface
First, remove post-print debris (dust, excess material). Wipe the entire TPU part with 90%+ isopropyl alcohol (IPA) and a lint-free microfiber cloth. Avoid over-soaking; dampen the cloth and wipe gently in circular motions to lift particles (not spread them). Let the part dry completely before proceeding.
Why? TPU surfaces often have residual oils from filament manufacturing or printing, which block paint adhesion.
2. Surface Treatment
After cleaning, create micro-abrasions to help paint grip. TPU’s rubbery texture resists traditional sanding—unlike rigid filaments like PLA, it stretches or fuzzes under pressure.
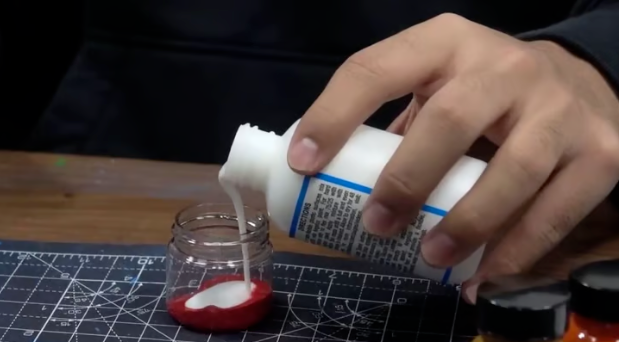
- For minor flaws (seams, uneven layers), apply a small amount of flexible spot putty (e.g., Bondo spot putty). Let it dry, then sand lightly.
- Light sanding with 400–600 grit sandpaper works—focus on creating texture, not smoothness. Use minimal pressure to avoid distorting the part.
- For small bumps or stringing, use a heat gun on low setting (15–20 cm from the part) to gently smooth surfaces. Avoid high heat, which can melt or warp TPU.
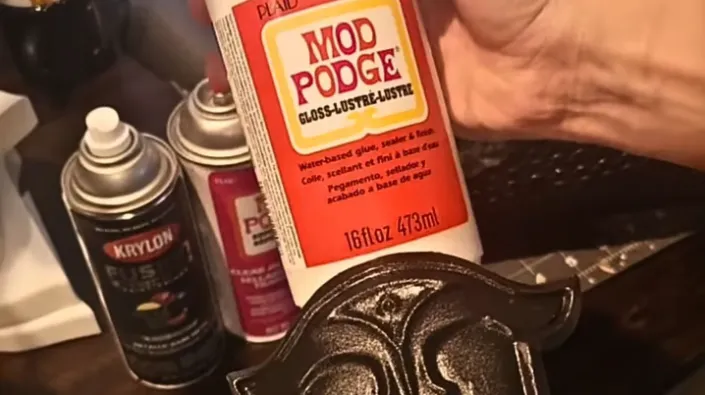
3. Apply Primer
Boost adhesion with a flexible primer or adhesion promoter designed for plastics/rubber:
- Angelus Adhesion Promoter: Enhances bonding of flexible acrylics to non-porous surfaces like TPU.
- Mod Podge (Fabric or Gloss): A mild water-based primer that dries clear, works well with Angelus or other acrylic leather paints.
- Flexible Gesso: Originally for canvas, it adds flexibility without stiffening the part.
Apply thin, even coats, waiting 25–30 minutes between layers (check product instructions).
What to Avoid
- Aggressive sanding or power tools: They damage TPU’s structure.
- Vapor smoothing (used for ABS): It has no benefit for TPU.
- High heat during surface treatment: It softens or warps TPU.
Tip: Use a pre-made kit with flexible putty, sanding sponges, lint-free cloths, IPA (90%+), and flexible primer. Test methods on a small, hidden area first.
3. Painting Methods
Once prepped, it’s time to paint. Choose methods that preserve TPU’s flexibility.
Airbrushing
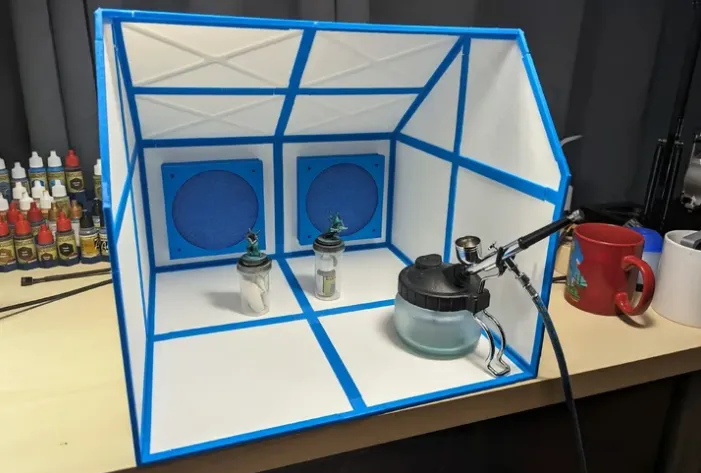
One of the most effective methods, especially with flexible paints like Angelus. A fine mist ensures even coverage without thick layers, maintaining flexibility.
- Thin paint slightly with acrylic thinner or water to prevent clogs.
- Apply multiple thin coats, drying between layers.
- Keep the airbrush 20–25 cm from the surface for uniform coverage.
- Use low pressure (20–25 psi) to avoid pooling or blowing off wet paint.
Best for: Flexible props, wearables, and cosplay armor needing a smooth finish.
Brush Painting
Use soft synthetic brushes with direct-apply, flexible fabric paints for small areas or details.
- Choose flat or round brushes based on the area (narrow curves, small holes).
- Apply thin, even strokes to avoid streaks or buildup.
- Let layers dry to prevent lifting underlying paint.
Best for: Touch-ups, small props, and accent details.
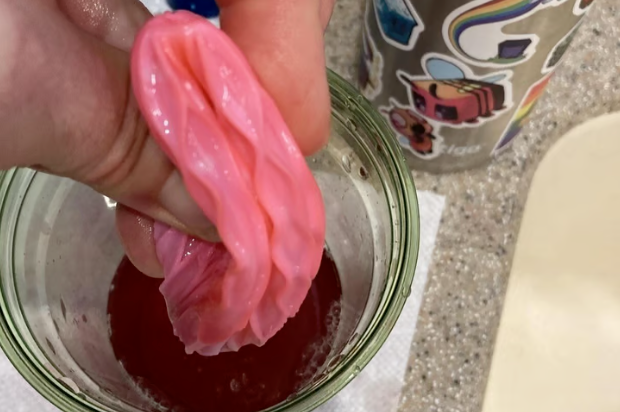
Dyeing
Immerse the entire print in heated dye to color the TPU itself (not just coat it), reducing cracking risk when bent. TPU is semi-porous and absorbs certain dyes when heated (less effective on dark TPU).
- Use dyes for synthetics, plastics, or nylons.
- Heat dye to 60–70°C (avoid boiling, which softens TPU).
- Submerge for 5–10 minutes until desired color is reached.
- Rinse, dry, and seal if needed.
- Add a tablespoon of dish soap to the dye bath to improve absorption.
- Clean parts with IPA first, then protect undyed areas with flexible masking tape or liquid frisket (avoid standard painter’s tape, which may peel paint).
4. What Not to Do
Painting TPU is delicate—avoid these mistakes to prevent failure:
- Using Rigid Topcoats: Glossy, hard finishes crack when TPU bends. Choose flexible topcoats labeled for leather or fabric.
- Skipping Flexible Primer: Standard primers for rigid plastics fail to bond, causing peeling.
- Using Harsh Solvents: Solvent-based paints can dissolve TPU surfaces. Stick to mild cleaners like IPA.
- Neglecting Surface Prep: Dirty or smooth TPU won’t hold paint—always clean and lightly abrade.
Fixing Mistakes
- Cracked Paint: Sand cracked areas (400–600 grit), clean with IPA, and reapply thin coats of flexible paint.
- Peeling Paint: Remove loose layers, re-prep the surface, and repaint.
- Total Failure: Soak the part in warm, soapy water to remove paint, then restart preparation.
5. Post-Processing Do’s & Don’ts
Post-painting steps enhance durability and appearance while preserving flexibility.
- Test Adhesion: Gently bend small sections to check for weak spots, especially at edges.
- Avoid Friction: Minimize rubbing against skin or fabric (critical for wearables like watch bands).
- Let Paint Cure Fully: Store parts away from heat, sunlight, or extreme cold during drying.
- Use Flexible Sealants: Apply Angelus Acrylic Finisher or similar water-based sealants to protect paint without stiffening.
- Avoid Strong Glues: Use fabric-safe Velcro instead of harsh adhesives to attach painted TPU parts.
- Seal Edges: Apply rubber cement to high-stress edges to prevent peeling.
- Add Functional Coats: For phone cases or handles, use soft-grip coatings (liquid rubber, Plasti Dip) to enhance grip—only over well-adhered paint.
- Keep a Log: Record paint, primer, and topcoat combinations for future repairs.
For more information, contact Debaolong Seiko. You are also welcome to upload your designs to Debaolong Seiko for a quote.