


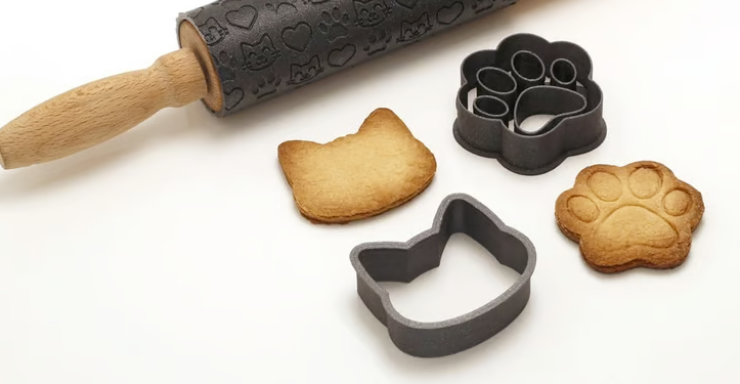
3D printing is amazing. It allows you to print a wide range of things, from everyday small items (like keychains and desktop organizers) to home decor, and even works of art! You can 3D print almost anything, including kitchen tools. In this article, we’ll delve into the world of cookie cutters, where 3D printing shines due to its customization possibilities.
We’ll use beginner-friendly online software to see how to create some beautiful personalized cookie cutters. We’ll also discuss considerations when creating 3D-printed parts that come into contact with food. If you want to skip the creative part and jump straight to 3D printing, you can check out our curated selection of cookie cutter models!
Let’s start our baking journey!
01 Food Safety
Before diving into the workflow of designing and 3D printing cookie cutters, there are some important aspects to understand. Food safety of 3D-printed parts is a well-known concern and a key factor to keep in mind when working on such kitchen projects. Beyond the chosen materials, two main issues are bacterial growth and material toxicity.
It’s common knowledge that 3D printing creates the final object by layering material. The food safety problem arises in the gaps between these layers: once the part comes into contact with food, these areas can harbor bacteria.
But that’s not all: your 3D printing setup is also extremely important. The machine’s nozzle and print bed need thorough cleaning. For example, for the nozzle, you should avoid using brass 材质. Whether your printer has been used for multiple projects or is brand new and just unboxed, you need to ensure the equipment is sanitized and food-safe practices are adopted. We’ll explore some of these aspects further below.
Material Considerations
As we mentioned, materials are another key factor that can make or break your cookie cutter. The filament you use will greatly affect the food safety of the part. For a product to be considered food-safe, it needs to meet certain official standards; for instance, the part must not transfer harmful substances to food. Therefore, it’s crucial to ensure the material you plan to use doesn’t leach toxins.
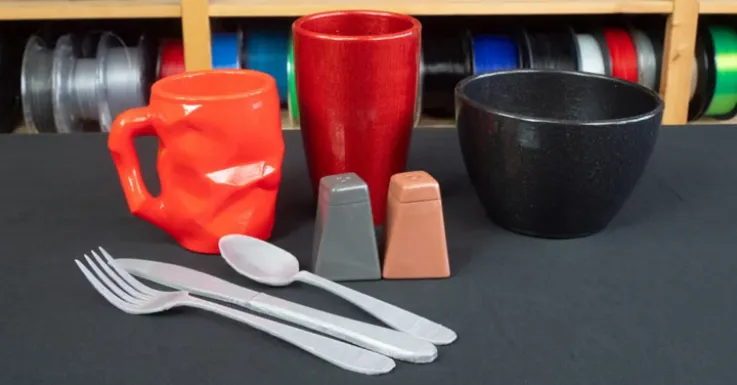
PLA and PETG are materials to consider for printing food-contact items – but not all filaments are food-safe, and most importantly, not all brands are the same. You need to purchase filament spools suitable for this project by looking for those labeled “food-safe.”
02 From Imagination to Design
Now that we’ve covered all the important information needed to make food-safe cookie cutters, let’s move to the fun part: how to create your own molds! There are various ways to model cookie cutters, such as using CAD software or online generators. In this guide, we’ll use the super-simple Cookiecad Designer. Let’s dive into the process!
Software
Cookiecad Designer (https://cookiecad.com/) is a web application for generating and customizing cookie cutters. It’s developed by Cookiecad, a company that also produces filaments and CAD software.
Cookiecad is free, but the paid version ($14.99/month or $150/year) offers premium features, such as access to the Cookiecad library and the ability to save settings. If you run into issues or want to request a feature, you can find a short official guide and a forum.
This online generator is very easy to use. With just a few clicks, you can generate custom cookie cutters, so let’s get to the fun part!
Design
The first thing in creating a cookie cutter is the design. What will the shape be? This is the best part because 3D printing allows you to create custom cookie cutters you can’t find in stores!
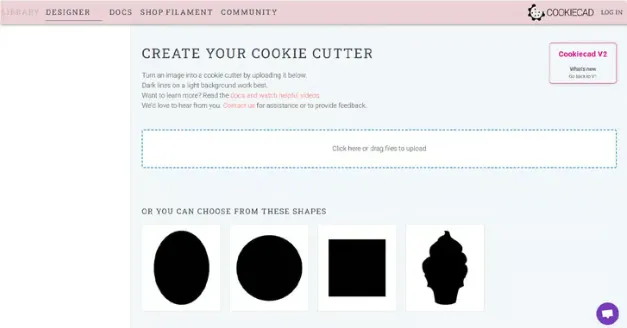
When preparing your design, remember that Cookiecad Designer only accepts JPEG and PNG files. If your image is in a different format, you can use an online converter (like FreeConvert) to convert it to JPEG or PNG. Once you have the image in the required format, you can drag and drop it into the corresponding space in the Cookiecad interface.
If you’re using the software for the first time and want to experiment with different settings, you can also choose a template from the homepage to familiarize yourself before working on your own design.
Once you select a pre-made design or upload your own, the software will process it and move to the next interface: the customizer. You should now see a preview of the cookie cutter.
Types of Cookie Cutters
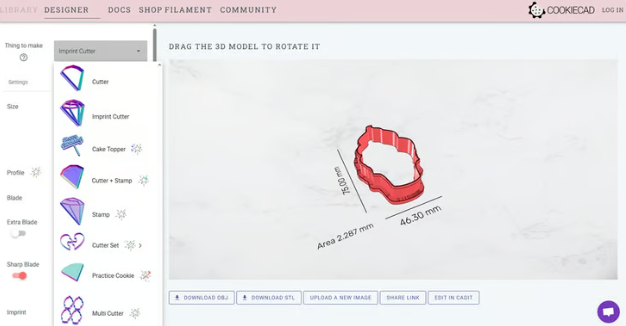
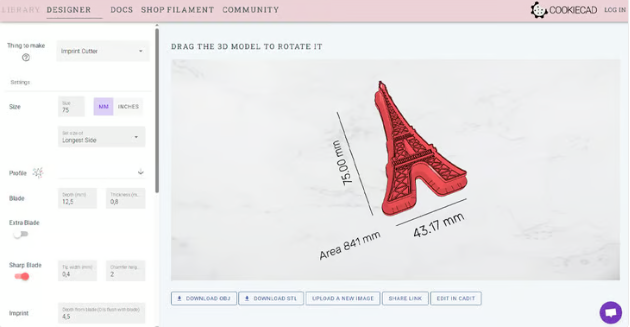
With the design ready, it’s time to choose the type of cookie cutter. There are four options. “Cutter” and “Imprint Cutter” are available in the free version of the program, while “Cutter + Stamp” and “Stamp” are part of the premium subscription.
“Cutter” is the simplest type, so it’s a good idea to start experimenting with it when generating a cookie cutter for the first time. This design will generate a cutter based solely on the outer 轮廓 of the image you select.
“Imprint Cutter” also generates internal shapes. This allows you to create more detailed cookie cutters. “Cutter + Stamp” is similar, but the depth of the internal 轮廓 in this option differs from the outer blade, so it doesn’t cut the dough but leaves an imprint on it. Finally, “Stamp” only leaves an imprint on the dough.
There are other advanced options, such as “Cutter Set,” which allows you to generate a set of cutters from a single shape; or “Multi Cutter,” which can generate a batch of cutters at once.
Customization
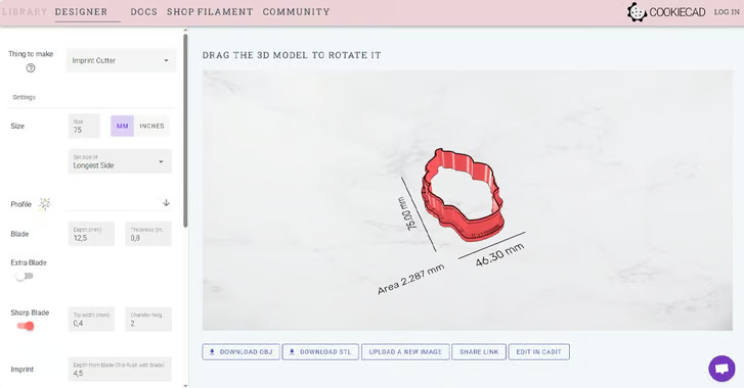
At this point, you should see a 3D preview of the cookie cutter in the Cookiecad interface. On this page, you can also customize other aspects of the model, such as the size of the shape and the thickness and depth of the blade that cuts into the dough.
The settings are very intuitive: you can modify the size of the cutter in the “Size” section and specify whether to use millimeters or inches. Below this section is the “Blade” menu for setting its depth and thickness. These settings are important for generating a functional cookie cutter that won’t easily break. You can also add a center bar to reinforce your part by toggling the “Center bar” switch.
By now, you should have a 3D model ready for download. But if further adjustments are needed, check out the “Experimental Settings” menu. Here you can find additional options, such as mirroring or the resolution of the part, to make the shape closer to the original image.
Design Considerations
Now you should have a cookie cutter ready for 3D printing. You just need to click “Download STL” to get the file and prepare the G-code for your machine. But before sending the file to the 3D printer, there are some things to note.
- Details: Since cookie cutters need to cut into dough, the part needs enough strength to withstand the force applied during this process. If your image has many small details, there’s a high risk of the printed part breaking and contaminating the food. Therefore, avoid using complex images and choose simple outlines that Cookiecad can handle easily.
- Floating islands: Similarly, you need to be cautious of floating structures, such as details connected to the cookie cutter by thin threads of material, which may break during use. They can easily snap and introduce plastic particles into your dough.
- Blade: The blade is the part that bears the most stress, so its durability is crucial. Try to make it at least 0.8mm thick; for added safety, 1.2 or 1.6mm is better. Additionally, the deeper the blade, the more prone it is to breaking, so use an appropriate height that allows it to cut through the dough while keeping the blade strong enough. As mentioned earlier, you can also use a center bar to make the cookie cutter more robust.
03 3D Printing
As mentioned above, 3D printing food-safe items is a combination of materials and 3D printing settings.
Preparing Your Machine
Before printing the cookie cutter, you should thoroughly clean your machine. The safest approach is to replace the entire hot end with a brand-new, unused one and use a thoroughly cleaned new print bed. But if you want to use your current setup, consider cleaning the hot end with cleaning filament to remove residual plastic particles from previous prints.
For such applications, a glass bed is ideal because it’s easy to clean and has no textured surface (unlike most PEI print beds, which are harder to clean). Additionally, you should use a nozzle not made of brass to avoid potential lead contamination.
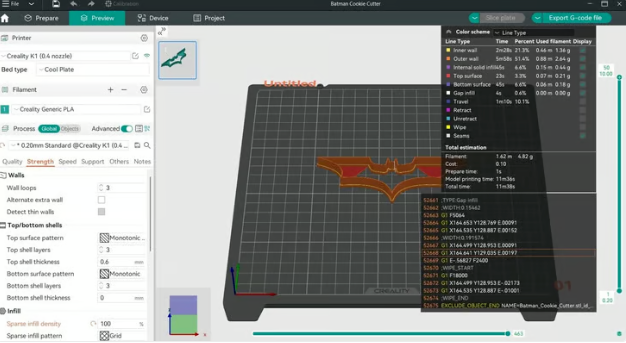
Slicer Software Settings
When preparing the model for printing, arguably the most important settings are those related to strength. For a 0.4mm nozzle, use 3 to 4 layers for wall thickness and increase the infill to 100%. This will ensure the blade is as strong as possible and the base of the cookie cutter is resistant.
You can also increase the layer width to enhance adhesion between different layers and walls. It may be worth considering using a larger nozzle, such as 0.6mm, for a more robust part.
Not many other adjustments are needed. Cookie cutters are usually simple shapes with geometries that don’t require supports. Ensuring the machine is properly calibrated is important for increasing the success rate of food-safe cookie cutters.
Tips for Best Results
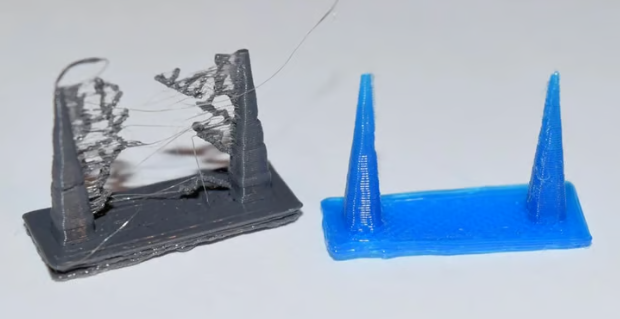
Before printing the cookie cutter, it’s highly recommended to properly adjust the retraction settings to avoid stringing inside. While a lighter can help with stringing issues, it reduces the food safety of the part.
For the same reason, it’s best to position the seam on the outer wall. This should result in a slight seam that doesn’t create additional spaces for bacterial growth. In this case, the seam is not an aesthetic issue but a functional one. Different software offers different customization options in this regard, so make sure you understand what your slicer provides.
04 Post-Processing
Even if you’ve followed all the tips we mentioned, you might want to be extra safe and use post-processing methods to ensure your part is safe for food contact. This technique can make prints safe even if they’re not made with food-safe materials or if all the above precautions weren’t taken.
The technique involves coating the entire print with food-safe resin. This encases the print in a food-safe material and creates a smooth surface, eliminating the risk of bacterial growth between layers. If you choose this method, first gently sand the 3D print. This creates a rough surface for the resin to adhere well to.
After that, you can coat your part. Depending on the type of finish used, multiple coats may be needed. Ensure each coat is fully cured before applying the next.
05 Use
If you don’t want to go through the hassle of post-processing, there’s a cheap and quick alternative to safely use 3D-printed cookie cutters: wrap them in plastic wrap so the print doesn’t come into direct contact with food. Cut a piece of plastic wrap slightly larger than the cookie cutter and use it to cover the 3D-printed part. For a clean cut, make sure the plastic wrap doesn’t interfere with the blade.
If the 3D-printed cookie cutter comes into contact with dough, it needs to be cleaned. While you can hand-wash it with dish soap, avoid using a dishwasher because the drying cycle may melt the part. For the same reason, don’t use hot water when hand-washing, as it may weaken the part over time; opt for lukewarm water instead.
Additionally, when using 3D-printed cookie cutters, try to apply gentle rather than strong pressure to avoid damaging the structure. After all, they’re made of plastic, not metal, so handle with care. Obviously, the thinner the dough layer, the easier it is to cut out shapes.
For more information, please contact Debaolong Seiko. You are also welcome to upload your designs to Debaolong Seiko for a quote.