


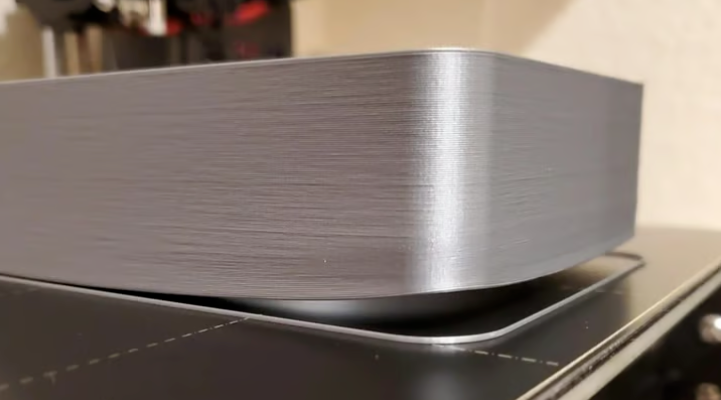
When the extruded filament cools too quickly and shrinks, this problem arises. This, in turn, pulls on the previous layer, creating tension. That layer then pulls on the one below it, and so on, all the way down to the first layer. If the adhesion to the heated bed is insufficient, the first layer will lift from the bed, resulting in warping. Therefore, this issue is more pronounced when printing with polymers that have higher temperatures and higher shrinkage rates, and in an overly cold chamber environment. Even if no warping is observed, it can cause tension and internal stress within the part (and between layers), leading to reduced tensile strength and impact resistance.
Filaments used in FDM 3D printing are typically thermoplastics, which can melt (turn into a liquid), cool (turn into a solid), and still retain their properties. In 3D printing, we heat the filament above its melting point and then extrude it onto the build plate.
Thermoplastics expand when heated and shrink when cooled and solidified again. This transformation creates movement in the extruded plastic, which is the root cause of 3D printing warping: hotter layers pull on colder layers as they cool and shrink. When the earlier layers of a printed object cool and shrink faster than the new molten layers, the object is forced to release its grip on the build surface and curl up.
Worse still, this problem can suddenly appear after a large portion of the printing job is completed, ruining an otherwise perfect print!
If we could keep the entire 3D-printed model at exactly the same temperature at all times, not even a small corner of the model would try to warp. However, this is almost impossible. We can do our best to keep the temperature of the 3D-printed model as uniform as possible!
Rare Case: Print Bed Warping
Some enthusiasts say that the print bed warps along with the printed part. If you encounter this problem, you will need a higher chamber temperature to reduce shrinkage and internal stress.
Temperature
Temperature – not just the temperature of the filament, but also that of the heated bed and the surrounding air – is perhaps the most important factor in preventing warping, as it allows for gradual cooling and shrinkage. Here are some tips for maintaining optimal temperature conditions:
- Use a heated bed: A heated build plate helps with bed adhesion and keeps the first layer (or the first few layers) in a semi-solid state. Usually, filament manufacturers recommend ideal bed temperatures for each type of filament. If you encounter warping, try increasing the temperature of the heated bed for better first-layer adhesion – but if you go more than 15°C above the manufacturer’s or material’s typical recommendations, this might not be your issue.
- Use an enclosed heated printing chamber: A heated chamber helps maintain a high and constant ambient temperature throughout the printing process, thereby reducing sudden cooling and shrinkage, and lowering internal stress and warping. This is especially important for more professional filaments, as it also improves the mechanical properties of the printed part.
- For materials such as PLA or PETG (which typically don’t require an enclosed chamber for printing), ensure that the chamber temperature is relatively low to prevent nozzle heat creep (which can cause clogging, especially when printing at slow speeds). For PLA, the chamber temperature should generally not exceed 35°C; for PETG, not exceed 45°C.
- If you don’t want an enclosed setup, control the room temperature by closing doors and windows to avoid cold air affecting the 3D printing.
- Adjust cooling: This can be tricky because you still need to cool the filament for better bridging, reduce stringing, and ensure that the molten plastic maintains accurate geometry. Turning off or reducing the speed of the cooling fan directed at the 3D-printed part during the first few layers can prevent excessive shrinkage that leads to warping and may help the model adhere to the build plate.
Use Adhesives
Improving the adhesion of the bottom layer to the print bed is often sufficient to prevent corner warping. This solution usually involves applying a layer of sticky substance to the bed before starting the print.
When using any adhesive, it’s a good idea to print a small part first to test that it doesn’t work “too well”. You certainly don’t want it to stick so firmly that you damage the part or even the bed when removing it!
- Use hairspray: This helps establish a good grip for most filament types. You can also use specially formulated 3D printing bed sprays, such as 3DLac.
- Use PVA glue sticks: A regular old glue stick is another popular option. There are also specific bed adhesion products, like Magigoo. This glue should help PLA and other filaments stick to the build plate. Whatever you choose, you only need a thin, even coat on the build plate.

Change Your Slicer Settings
Some slicer settings can help prevent warping and keep the print secured to the bed:
- Reduce printing speed: You’ll be surprised how often reducing the printing speed solves the most stubborn printing issues, such as warping and curling. This is especially true for the first layer, which should be printed much slower than subsequent layers for better adhesion to the build plate.
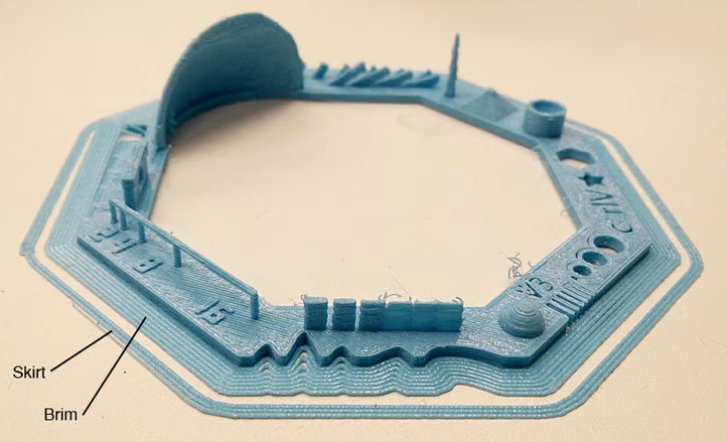
- Create a brim or skirt in the slicer: A skirt is a ring of offset lines around the edge of the part, while a brim is one or more additional contour lines attached to the edge of the base. This gives your model a wider base, enhancing its grip on the build surface.
- Add a raft: A raft is a structure that makes the bottom of the 3D-printed model larger, similar to a brim. However, it also extends under the entire bottom of the part. This creates better grip on the build surface but should be easier to pry off the model.
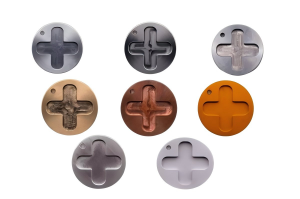
- Add mouse ears: Also known as brim ears, mouse ears are small discs a few layers high that you print under the model to enhance bed adhesion at the corners. Place the discs on the build plate in the slicer so that they just touch each corner of the model. They’ll be very easy to remove from the model once printing is complete. You can download some ready-made mouse ears from tugeagon on Thingiverse, draw your own using CAD software, or use a slicer that already includes this feature – such as Orca Slicer. For programs like PrusaSlicer, you can add single-layer cylinder modifiers at the corners of the part to act as mouse ears.
Keep Your Bed Clean
Last but not least, the problem might lie in a very simple thing: a small amount of grease or dust on the build plate can cause poor bed adhesion, leading to warping. These foreign substances may come from your hands touching the build plate, perhaps after removing the previous print! Or, if you’ve used glue or other adhesives, or even tape, there may be unwanted residues left behind, posing challenges for the next print.
It’s a good idea to thoroughly clean your heated bed with soap and water before each print to ensure it’s clean for a strong first-layer adhesion – and make sure not to touch the printing surface afterward. If that’s too inconvenient, wiping with some isopropyl alcohol (IPA) between prints is also quite effective, though you need to be mindful of compatibility and avoid damaging the build plate depending on its material.

For more information, please contact us at Debaolong Seiko. You are also welcome to upload your designs to Debaolong Seiko for a quote.